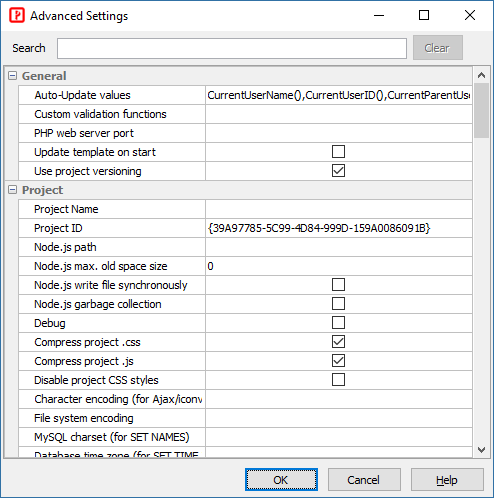
Project
Project-specific settings
Project name
Project name. See
Project File for more info.
Note It is recommended that you use only alphanumerical characters in lowercase in project name.
Project ID
Unique ID of the project. Do not change the project ID unless absolutely necessary. See
Project File for more info.
Node.js max. old space size
Memory limit of Node.js (MB). If your project is large, you may need to increase the memory limit, e.g. you can set it to 2048, 3072, 4096, etc.
Notes
- Set the setting according to the available memory of your system,
- If you need to use a large setting, you may need 64-bit version of Node.js. If your PC is 64-bit, download the latest 64-bit Windows installer and install it, then set Node.js path (see above) as the installed path, e.g. C:\Program Files\nodejs.
Node.js write file synchronously
Write file synchronously. By default, output files are generated asynchronously. Use this setting if writing file synchronously performs better on your system.
Node.js garbage collection
Use Node.js garbage collector to clean up memory regularly during generation.
Note Cleaning up memory manually will slow down generation, only enable this setting if you encounter out of memory problem.
Debug
Show the SQL and runtime error for debugging.
During development, you should also enable the following advanced settings:
- Treat PHP warnings and notices as errors
- Show source code with error (development)
- Log SQL to file
- Log error to file
The log files for above can be found under the
Log file folder (see
PHP Settings) and are named as
log-yyyy-mm-dd.log.
In addition, make sure you have also configured your php.ini to display errors (and log errors if necessary):
- error_reporting (int) - set it to E_ALL
- display_errors (string) - set it to On
- log_errors (bool) - set it to On
- error_log (string) - set it to a log file on your server, e.g. "my/path/php_errors.log" (change "my/path" to your real path), the file should be writable by the web server's user. Note that this is error log by the php.exe, NOT same as log files (by PHP scripts) above.
Treat PHP warnings and notices as errors
For use with
Debug enabled only. Report all PHP errors by
error_reporting(E_ALL) and treat PHP warning and notices as errors.
Show source code with error (development)
For use with Debug enabled and Environment (see below) set as development only. If enabled, when runtime error occurs, the detailed error info will be shown with source code.
Log SQL to file
Log SQL to file. The log files can be found under the
Log file folder, see
PHP Settings.
Log error to file
Log runtime error to file. If
Debug is enabled, the setting will also be enabled. The log files for above can be found under the
Log file folder (see
PHP Settings) and are named as
log-yyyy-mm-dd.log.
Environment
Environment of application. Possible values:
development or
production. Default value is
development. After development, you can generate the application again with enviroment as
production, then the application will use the
config.production.php instead of the
config.development.php. The
config.production.php contains production database connection, SMTP server and JWT settings.
Notes
Before you generate your project for deploying to production server, you should change this setting to "production" and review if you need to change the following advanced settings:
- Log SQL to file (For debugging your production site with the Debug setting disabled)
- Log error to file (For debugging your production site with the Debug setting disabled)
- Compile container for production (Consider this if you have a very large number of tables)
- Generate route groups (Recommended to disable if you don't need routes like /cars/list)
- Use route cache for production (Consider this if you have a very large number of tables)
- Compress project .js (Recommended)
- Compress project .css (Recommended)
Generate production config file
Whether to generate the config.production.php. Enable this setting if you have updated the config.production.php manually and you do not want it to be overwritten by later generation.
Compile container for production
PHPMaker uses
PHP-DI, the dependency injection container can be compiled into PHP code optimized especially for your configuration and your classes. If the
environment (see above) is set as
production, and this setting is enabled, then compilation will be enabled.
Notes
- When enabled, the container will be compiled once and never be regenerated again.
- When you deploy new versions of your scripts (for example, after adding or deleting a table) to production, you must delete the generated file (<ProjectFolder>/<UploadPath>/cache/CompiledContainer.php) to ensure that the container will be re-compiled.
Generate route groups
Whether to generate route groups so that user can also use alternative route for table, e.g. /cars/list instead of /carslist. Default is true. If that is unnecessary for you or you have a large number of tables, you can turn it off for better routing performace.
Use route cache for production
Whether to enable to enable router cache. If the
environment (see above) is set as
production, and this setting is enabled, then route cache will be enabled. If you have a large number of tables, you can enable this for better routing performance.
Notes
- When enabled, the cache will be compiled once and never be regenerated again.
- When you deploy new versions of your scripts (for example, after adding or deleting a table) to production, you must delete the generated file (<ProjectFolder>/<UploadPath>/cache/RouteCache.php) to ensure that the cache will be re-compiled.
RewriteBase directive
The
RewriteBase directive specifies the URL prefix to be used for per-directory (htaccess)
RewriteRule directives that substitute a relative path. For Apache only. If your web servers requires this setting, enter the URL prefix for the project folder here.
Generate .htaccess
Whether to generate the .htaccess for Apache. Enable this setting if you have your own .htaccess and you do not want it to be overwritten by .htaccess from the template.
Notes
- URL Rewrite is still required, your own .htaccess MUST be properly configured for URL Rewrite.
- This setting does NOT affect the .htaccess for the "api folder.
Generate web.config
Whether to generate the web.config for IIS. Enable this setting if you have your own web.config and you do not want it to be overwritten by web.config from the template.
Notes
- URL Rewrite is still required, your own web.config MUST be properly configured for URL Rewrite.
- This setting does NOT affect the web.config (if any) for the "api folder.
Compress project .css
Compress the project stylesheet (e.g. <project>.css) and output minified .css file. This setting is ignored if Debug (see above) is enabled.
Compress project .js
Compress project JavaScript (e.g. Client Script and Startup Script, see
Server Events and Client Scripts) and output minified .js. This setting is ignored if
Debug (see above) is enabled.
Disable project CSS styles
Do not generate the project stylesheet.
Note If you use this setting, there will be no CSS styles generated for the scripts and the HTML will be malformed, make sure you provide your own CSS styles, for example, by specifying your own stylesheet, read
HTML Settings.
Character encoding (for Ajax)
Specify the encoding for Ajax
Some features such as Ajax require conversion between your encoding and utf-8. If you use non English languages, you may need to set character encoding for these features. By default PHPMaker will setup the encoding automatically based on your project's Charset setting. If that is incorrect, you can specify yours. Make sure either iconv Functions or Multibyte String Functions are enabled and the encoding you specified is supported. See PHP manual for details.
File system encoding
The encoding of the file system of the server.
When saving a file to the server, the file name need to be converted to the file system encoding. If your project charset/encoding is different from the file system encoding and you accepts non alphanumeric file names, enter the file system encoding of the server
Validate NOT NULL fields
By default PHPMaker will detect fields declared as NOT NULL in the database (and without default value in database or the project) and force "Required" validation. If for some special reason you need to disable this feature, disable this setting.
Add novalidate attribute to forms
Add
novalidate attribute to HTML
<form> element. The novalidate attribute indicates that the form shouldn't be validated when submitted. Since PHPMaker uses its own validation, you might want to disable browser's form validation.
Add autocomplete='off' attribute to forms
Add
autocomplete attribute to HTML
<form> element and set it to "off". If enabled, the browser is not permitted to automatically enter or select a value for this field.
Allow login by URL
Allow passing username and password to the login page as URL parameters.
By default the login page accepts HTTP POST only. If this setting is enabled, it accepts HTTP GET also, then user can login by URL , e.g.
login?username=xxx&password=yyy (where "yyy" is a plain text password)
For example, this allows user login by using PHP cURL from your own scripts.
For example, this allows login by your own scripts.
For security, you should pass encrypted username and password whenever possible. You can decrypt them with your code by User_CustomValidate server event before validation, see Server Events and Client Scripts.
Remove XSS
Specify if sensitive keywords allowing XSS attack should be removed.
If enabled, all user input string will be checked against an array of sensitive keywords. If discovered, those keywords will be removed to prevent XSS attack. If this behavior is unwanted, you can disable this feature at your own risk. Re-generate and re-upload the config.php after changing this setting.
XSS removal is done by HTML Purifier with default configuration, if you just want to customize the configuration, you can use server side Global Code (see Server Events and Client Scripts) to modify the global variable $PurifierConfig which is used to create instance of HTMLPurifier, e.g.
Read HTML Purifier configuration documentation for details.
Check token for form post
Check token for forms with method="post". The token is used to prevent Cross-Site Request Forgery (CSRF).
If you use Custom Files with Include common files enabled, and you add your own HTML forms with method="post", make sure you add the token to your form by hidden tags, e.g.
Session timeout period (minutes)
Specify the session time-out period if the user does not refresh or request a page.
PHP has its own settings for session timeout, you can configure them in php.ini, read Runtime Configuration, but sometimes you may want to control the session period yourself, then you can setup BOTH this setting and the Session keep alive interval (seconds) setting (see below) to a positive value.
Session keep alive interval (seconds)
Specify the interval to send Ajax request to the server for keeping the session alive.
Notes
- For this setting to work, this setting MUST be SHORTER than the session.gc_maxlifetime and session.cookie_lifetime in php.ini, otherwise the session will be expired by PHP first. Do not set the interval too short, making requests to the server every 300-600 seconds (5-10 minutes) should be enough.
- To enable this feature, this setting must be set to a value larger than 0.
Session time out countdown period (seconds)
Specify the countdown period before session ends.
When the session is about to end, a modal dialog will show up to remind user and let the user choose to continue the session. If the user does not respond after the countdown period, the session will expire.
Composite key separator
The separator between key values of a composite key. Default is ",".
If your primary key values are of string type and contain commas also, the commas will affect parsing of the composite key value in the script and lead to failure of locating a record, you can change the separator to avoid such problem.
Export all time limit
Set time limit (seconds) when exporting all records
Export field caption
Export field caption instead of field names during export. (For tables/views only.)
Export field images
Export field images for image fields during export. If uncheck, the original field value is exported. (For tables/views only.)
Export original values
Export original field values instead of looked up values (for fields setup with user values or lookup tables) during export. (For tables/views only.)
Export CSS styles
Export HTML/Excel/Word with CSS styles (e.g. for keeping the row color in the exported file).
Note Not application to PhpSpreadsheet and PHPWord extensions (for registered users).
Export master record
Specify if master record should be exported during exporting master/detail records. (Not applicable to CSV) Default is true.
Export master record for CSV
Specify if master record should be exported during exporting master/detail records to CSV. Default is false.
If master record is exported, the result CSV may not be imported into other application. If you want to export it anyway, enable this setting.
Export detail records in Master/Detail-View
Specify if detail records in View page of master table (in Master/Detail-View) should be exported. Default is true.
Export detail records for CSV in Master/Detail-View
Specify if detail records in View page of master table (in Master/Detail-View) should be exported for CSV. Default is false.
Show vertical master record in List Page
Specify if master record in List page of detail table should be displayed in vertical format. Default is true.
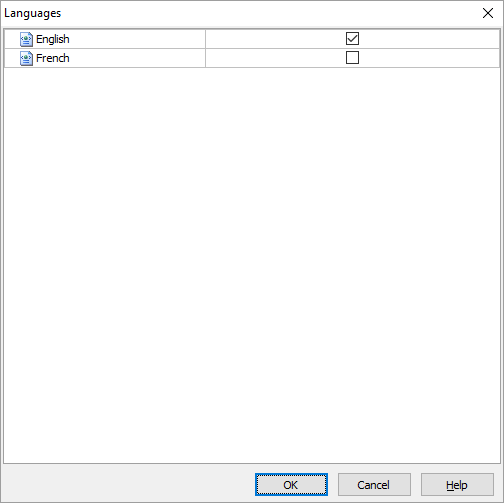
Language files
The default language files for a project. (For use with Multi-Language.)
Allow no paging section
Allow no paging section in List page.
If both paging section at top and that at bottom are disabled, users will not be able to go to the second or later pages of the recordset. The scripts will use paging section at bottom by default to make sure paging is possible. If you want to allow no paging section (e.g. you always have all records in one page), enable this setting.
Auto hide paging section if single page
If only one page (i.e. number of records <= page size), hide the paging section automatically.
Auto hide page size selector if single page
If only one page (i.e. number of records <= current page size), hide the page size selector section automatically.
Note Beware that if you auto hide the page size selector, user cannot change page size, even one or more selectable page sizes are smaller than the current number of records.
Initiate search panel as collapsed
Specify if the search panel should be initialized as collapse on page load.
Blob field byte count for hash value calculation
For use with
Check Conflicts (see
Table Setup). Specify the number of bytes for calculating the hash value . Default is 200.
Check Conflicts will increase the time required to load the page, for better performance only the first hundreds of bytes of the BLOB fields are processed by default, but there are chances that change of BLOB data is not detected (if the first nth bytes are not changed). You can increase the number of bytes, if you want to process all bytes, enter 0.
Auto-Suggest maximum display entries
Specify the number of options to be displayed during Auto-Suggest. Default is 10.
Auto-Suggest all display fields
Specify if Auto-Suggest should consider
Display field #2 to #4.
By default lookup only uses Display field #1 and only finds records with Display field #1 that STARTS WITH the input characters. It this setting is enabled, Auto-Suggest finds records with Display field #1 to #4 that CONTAINS the input characters
Lookup page size
Page size of modal lookup. Modal lookup supports pagination (infinite scrolling), this setting specifies the number of records per page.
Filter page size
Page size of column header filter. Filter supports pagination (infinite scrolling), this setting specifies the number of records per page.
Auto-fill original value
For use with
Auto-Fill (see
Field Setup). By default the looked-up value (if any) will be used to fill the target field, enable this option to use the original (database) value instead.
Grid-Add row count
Specify the initial number of blank rows in Grid-Add and Master/Detail-Add mode. Default is 5.
Use View Tag format for edit
Specify if the View Tag format should be used during editing.
By default all decimal digits as outputted by the database will be used in Edit page, for example, if a number is 1.23456 in database, the Edit page will also show 1.23456 even you may have specified just 2 decimal digits in View Tag panel (see Field Setup). If you want to show the number as in the View page, you can enable this setting. However, note that after saving the record, the number will be saved as 1.23 only even you have not edited the field value.
Note If you enable this setting, there may be loss of precision after saving the record. Only use this setting when precision is unimportant.
Use Ajax actions (List page)
Use Ajax to do searching, sorting, Inline-Add/Copy/Edit/Delete, Multi-Delete/Edit/Update, and Grid-Add/Copy/Edit and then update the List page without reloading the page.
Note Custom Template is not supported.
Fall back user level permissions
Fall back Import/Push permissions to Admin permission and Export/Lookup permissions to List permission. For temporary backward compatibility only. NOT recommended for new projects. In the long run you should update your projects and set up the Import/Export/Lookup/Push permissions for each user level.
Connection info of production server (JSON)
Specify connection info of databases for production server in JSON, e.g.
{ "DB": { "user": "foo", "password": "bar", "ssl_xxx": "...", ... } }
Notes
- In JSON, keys must be strings, written with double quotes.
- You only need to provide info that is different from the development connection info.
Database time zone (for SET TIME ZONE)
Specify the database time zone for MySQL/PostgreSQL/Oracle.
MySQL charset (for SET NAMES)
Specify the charset for MySQL SET NAMES statement.
If actual charset encoding of your data is different from the charset of your project, you may need to specify this setting for MySQL to convert between them. Read Connection Character Sets and Collations before using this setting.
Collation for LIKE operator (MySQL)
Use the specified COLLATION for the LIKE operator (for MySQL only).
MySQL driver
Specify MySQL driver for PHP. Possible values:
mysqli or
pdo_mysql. Default is
mysqli.
Use ILIKE operator (PostgreSQL)
Use ILIKE instead of LIKE for case-insensitive search (for PostgreSQL only).
Collation for LIKE operator (Microsoft SQL Server)
Use the specified COLLATION for the LIKE operator (for Microsoft SQL Server only).
Oracle charset
By default the project character is also used for connecting to Oracle. If you need to use a different charset, specify it with this setting.
Oracle compare
For setting Oracle's
NLS_COMP parameter. Requires Oracle 10gR2 (or later). Possible values are: BINARY, LINGUISTIC, ANSI.
For example, if you want to do case insensitive search you can select LINGUISTIC.
Oracle sort
For setting Oracle's
NLS_SORT parameter. Requires Oracle 10gR2 (or later).
For example, if you want to do case insensitive search you can enter "BINARY_CI" (no double quotes).
Multiple option separator
For use with Dynamic Selection List. Specify the separator for multiple selected values. Default is ",".
Use lookup cache
If enabled, lookup data will be cached in memory so all subsequent calls to lookup will use the cache data instead of database access.
Lookup cache count
The maximum number of records for lookup cache. Used in conjunction with Use lookup cache.
If the total number of records in a lookup is more than this value, lookup data will not be cached.
Lookup cache enabled pages
The pages where Use lookup cache is used. Default is "list,grid". By default only the "list" and the "grid" pages will use lookup cache (if enabled) because there are more than one records in those pages. If you want to use lookup cache in other pages also, you can add the page IDs, e.g. "list,grid,add,edit,search".
Web root relative path
Path of the web root relative to project folder. The project folder is the folder where the generated scripts reside. All relative paths (e.g. file upload paths) are relative to the web root. By default the web root is same as the project folder, so the value of this setting is "." (no quotes) or empty. It is recommended that you use this default value, only change it if you must use a web root folder which is not the same as the project folder.
Note Web root relative path MUST be a physical ancestor folder of the project folder, say, the physical parent folder of the project folder. It cannot be a virtual path. Therefore, the value can only contains ".", ".." and "/".
Create upload file on copy
Specify if an uploaded file should be copied when copying a record with file upload fields. (For use with file upload to folder.) Default is false.
If the option Delete file on update/delete (see PHP settings) is enabled, the uploaded file will be deleted. If the deleted record is a copied record, deleting the uploaded files will affect the original record. To prevent such possible problem, enable this setting to duplicate the uploaded file when copying a record.
Multiple file upload separator
Specify the file upload separator used to separate the file names. By default, comma is used. If you allow file names with comma, you can enter another separator, e.g. "|".
Upload preview thumbnail width (px)
The width of the thumbnail displayed during the upload process.
Upload preview thumbnail height (px)
The height of the thumbnail displayed during the upload process.
Encrypt file path
Encrypt upload file path if enabled.
File upload URL path
Specify the URL path of uploaded files. Default is empty, meaning that the path of the global or field specific upload folder will be used. However, under some rare cases, the URL path cannot be derived from the upload folder, then you can specify it explicitly.
File upload path (absolute) for temporary files
Specify the file upload path (absolute) for temporary files. If this setting is used, the matching
File upload URL path (absolute) for temporary files (see below) must also be set.
When working with file upload fields, some temporary files will be created and then deleted in a temporary folder. Default is empty, meaning that the global upload folder will be used. However, under some rare cases, you may want to specify your own. This path must be physical and it must be accessible by the web server, e.g. /some/real/path/ or D:\some\real\path\, and is accessible by URL (see next).
File upload URL path (absolute) for temporary files
Specify the file upload URL path (absolute) for temporary files, e.g. /my/virtual/path/ (root-relative URL) or //www.mycompany.com/my/virtual/path/ (protocol-relative URL). If File upload path (absolute) for temporary files (see above) is used, this setting must also be set so that the temporary files can be accessed by URL.
Use image cropper for file upload
Use image cropper for file upload. This setting applies to all file upload fields. If you only want to enable image cropper for a specific field in a specific page, do not enable this setting, you can use
Page_Load server event to set the
ImageCropper property of the field.
Thumbnail default width (px)
For use with image resize.
If a target resize width is <= 0, this default width will be used. If this setting is also 0, the width will be auto-adjusted to keep the aspect ratio.
Thumbnail default height (px)
For use with image resize.
If a target height width is <= 0, this default height will be used. If this setting is also 0, the height will be auto-adjusted to keep the aspect ratio.
Use Colorbox for images
Specify if colorbox should be used to displayed full size image on clicking the thumbnail in the List/View page. Default is true.
Reduce image size only (image resize)
Do not resize if image is smaller than the resize dimension.
Always keep aspect ratio (image resize)
Keep aspect ratio during image resize.
Embed PDF documents
Show PDF documents using
PDFObject as embedded documents instead of hyperlinks.
Allowed image file extensions
File extensions that will be treated as images for download. Comma separated.
Allowed non-image file extensions
File extensions that will be treated as non-image download files. Comma separated.
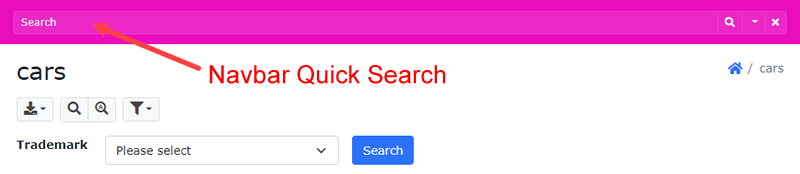
Navbar Quick Search
Whether to put the Quick Search input in the top navbar. By default the Quick Search input is at the bottom of the Extended Search form in the List page of a table.
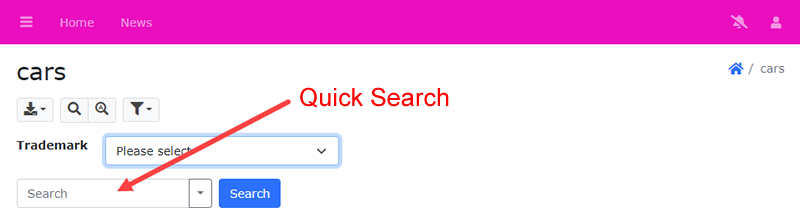
If this setting is enabled, the Quick Search input will be moved to the navbar.
Search keywords in any selected fields (Quick search)
For use with "All words"option of Quick Search, allows searching all keywords in any fields selected for Quick Search.
When searching "All words" with Quick Search (see Table Setup), by default all keywords must be found in the same field. This option provides an alternative searching behavior.
Search multiple value option
Option for searching fields that store multiple values as comma separated string.
Valid values are: (Default is 3)
1 - no multiple value, the whole comma separated string is considered as one string
2 - all multiple values must meet the search criteria (AND condition)
3 - either one of the multiple values must meet the search criteria (OR condition)
Search filter save option
Specify where to save the search filters. Possible values are: Server, Client, None. Default is Client, i.e. save by browser's localStorage.
Note If you choose
Server, the
Profile field (see
Security Settings) must be set up for storage.
Search option
Searching behaviour when users perform quick/extended search in the list page. Possible values below. Default value is AUTO.
AND - all keywords
OR - any keywords
AUTO - based on quick search keyword option
Sort option
Sorting behaviour when users click the List page table column header. Possible values:
Toggle - asc/desc
Tristate - asc/desc/none
Replace textarea by text input for search
Replace textarea by textbox in Search page and Extended Search. Default is true.
Minimum password strength
Minimum password strength if check password strength is enabled.
Password length
Password length when generating a random password.
Use password hash
For used with
Hashed password (previously
MD5 password), see
Security Settings. If this setting is enabled, PHP
password_hash function will be used to create password hash. By default CRYPT_BLOWFISH algorithm will be used. If this setting is disabled, the old
md5 function will be used.
Note Beware that if you enable this setting but the user table is still storing old MD5 passwords, users will NOT be able to login. Since MD5 passwords cannot be decrypted, you MUST reset the passwords for the users first or ask users to reset their passwords themselves.
Encrypt user name and password
If enabled, the administrator, database and SMTP server user name and password stored in the config file will be encrypted by
php-encryption.
Notes
- Make sure you enter your encryption key for Encryption key for data protection (see below).
- If you enable this setting, beware of the performance implication of php-encryption.
- To encrypt during generation, you must set up PHP CLI. The PHP CLI binary is distributed as php.exe on Windows. Add the folder containing your installed php.exe to your Windows PATH environment variable, then open command prompt and type php -v. If it is working properly, you should see the PHP version number.
Invalid user name characters
If Remove XSS is enabled, some characters are not allowed to be used in user names. Default value is <>"'&. You may add other characters, but you should not remove any characters from the default value.
Invalid password characters
If Remove XSS is enabled, some characters are not allowed to be used in passwords. Default value is <>"'&. You may add other characters, but you should not remove any characters from the default value.
Encryption key for data protection
Encryption key used by php-encryption. Use with Encrypt administrator and database user name and password (see above).
Add plain text version in HTML email
Add plain text version when sending HTML email.
PHPMailer mailer
Specify the
mailer used in PHPMailer when sending emails. Default is "smtp".
Export folder
Folder name for exported files. If unspecified, the folder name will be export-<Project ID>.
Max email recipient
For use with Export (Email). (see
PHP Settings.) Default is 3.
To avoid abusing the export to email feature, the number of email addresses in the recipient field is limited to the specified value.
Max email sent count per session
For use with Export (Email). (see
PHP Settings.) Default is 3.
To avoid abusing the export to email feature, the number of emails can be sent by the user in each session is limited to the specified value.
Log User ID instead of user name
Use user ID instead of user name for logging (e.g. audit trail). Default is enabled. Note that user ID only exists if User ID Security is enabled.
AdminLTE layout class
AdminLTE layout class. Possible values are: layout-fixed, layout-top-nav, layout-boxed, layout-navbar-fixed, or layout-footer-fixed. Default is layout-fixed.
Note PHPMaker template is based on the fixed layout only. If you change the layout using this option, there may be unexpected behavior and you may need to add some adjustments by CSS (and JavaScript) yourself. AdminLTE is not written by the author of PHPMaker. NO TECHNICAL SUPPORT WILL BE PROVIDED.
Use AdminLTE fixed header table
Use AdminLTE Fixed Header Table in List pages and Summary Reports. This setting applies to all tables, views and Summary Reports. If you only want to enable/disable it for a specific table, you can use
Page_Load server event to call the
setFixedHeaderTable() method of the page.
Notes
- Fixed Header Table does NOT support Crosstab Report and Custom Template.
- If you enable fixed header table, the Use Bootstrap responsive table setting (see below) must be "table-responsive".
- AdminLTE and its Fixed Header Table are not written by the author of PHPMaker. NO TECHNICAL SUPPORT WILL BE PROVIDED.
Fixed header Table height (CSS class)
CSS class for the table height. Note that Fixed Feader Table requires a table height to work, do not provide an empty setting, default is "mh-400px" (i.e. max-height: 400px). You can use the following utility CSS classes:
- "h-50px" to "h-1000px" (height, at 50px intervals),
- "mh-50px" to "mh-1000px" (max-height, at 50px intervals)
- "vh-10" to "vh-100" (viewport height, at 5vh intervals)
Note You can also use your own CSS class, but do NOT use CSS styles.
Use Bootstrap Toast message
Use
Bootstrap Toasts to display messages of the application. By default the messages are displayed above the main table. This options uses Bootstrap Toast to show the message instead. Default is true.
Use Bootstrap Switch for boolean fields
Use Bootstrap responsive table
Use Bootstrap
Responsive tables. A scrollbar will appear at the bottom of the table if the table is wider than screen. Default is true.
Responsive table class
The responsive table class name to use if use Bootstrap responsive tables. Possible values are: table-responsive, table-responsive-sm, table-responsive-md, table-responsive-lg, or table-responsive-xl. Default is table-responsive.
Fullscreen modal class
Bootstrap CSS class for
Fullscreen Modal dialogs. Possible values are:
modal-fullscreen, modal-fullscreen-sm-down, modal-fullscreen-md-down, modal-fullscreen-lg-down, modal-fullscreen-xl-down, modal-fullscreen-xxl-down. Default is
modal-fullscreen-sm-down, i.e. full screen modal will be used for mobile devices.
Use native SELECT tag for select-one fields
Use native
<select> HTML element for
select-one fields.
By default all<select> tags (fields with SELECT Edit Tag, see Field Setup) will be replaced by Select2 tags for more features. However, if this setting is enabled, native <select> tag will be used for select-one fields.
Notes
- Multiple selection fields (select-multiple) are not supported.
- Native <select> tags does not support HTML in options, so using HTML tags in Option Template (see Lookup Table) will NOT work.
Use drop zone for file upload fields
Use drop zone for file upload fields. If enabled, an file upload field looks like:

Otherwise, they are regular
Bootstrap file input fields.
Form left column CSS class
Specify the left column CSS class for all forms. This CSS class controls the width of the left column. Possible values are:
col-sm-2, col-sm-3, col-sm-4, col-sm-6. Default is
col-sm-2. See Bootstrap
Horizontal form for details.
Multi-column List page grid CSS class
Specify the CSS class for Multi-Column List page table layout. Possible values are:
row-cols-sm, row-cols-md, row-cols-lg. Default is
row-cols-md. See Bootstrap
Row columns for details.
Multi-column List page card CSS class
Specify the CSS class for Multi-Column List page card layout.
Multi-column List page card button position
Specify the position of the button for list options in card header/footer. Possible values are: top-end, top-start, bottom-end, bottom-start. Default is bottom-start.
Multi-column List page card left column CSS class
Specify the left column CSS class for the data in cards of Multi-Column List page. This CSS class controls the width of the left column. Possible values are:
col-sm-2, col-sm-3, col-sm-4, col-sm-6. Default is
col-sm-4. See Bootstrap
Horizontal form for details.
Use tabular form for desktop
By default Bootstrap
Horizontal form is used in Add/Edit/Search/Update/Registration pages, this option makes the scripts use Bootstrap table instead.
Notes
- The mobile mode still uses Bootstrap form, NOT table.
- The mobile detection is done on the server side for this feature. Unlike other pages, resizing desktop browser will NOT change the page from desktop mode to mobile mode.
Use dropdown for button group in mobile
Use button dropdown instead of button group to save more spaces for data in mobile mode. Default is true.
Use place holder for text box
Add
placeholder attribute to form elements automatically. Possible values are:
- None - no placeholder
- Caption - use field caption (see Field Setup) as placeholder attribute value (default)
- Title - use field title (see Field Setup) as placeholder attribute value
Page title style
Specify the page title style. Possible values are:
- None - no page title (with Breadcrumbs)
- Caption - table caption (without Breadcrumbs)
- Breadcrumbs - table caption (with Breadcrumbs) (default)
- Title - site title (with Breadcrumbs)
Authentication mode
Authentication mode: Possible values are: Windows, LDAP. If not specified, no authentication.
Notes
- If "Windows" is selected, only the server variable "AUTH_USER" is checked, you can use the function CurrentWindowsUser() to check the current Windows user name and the function IsAuthenticated() to check if the user is an authenticated user.
- If "LDAP" is selected, the following three LDAP settings are required.
- If User ID and/or User Level Security (see Security Settings) is enabled, after Windows/LDAP authentication, the built-in User ID/Level Security (if enabled) still applies and user table is still required. See User_CustomValidate (see Server Events and Client Scripts) server event for more information on getting User ID/Level from the user table.
LDAP host name
LDAP server host name
Notes
- Do not append your port (e.g. :389, :636, etc.) to the host name.
Use LDAP port number (see below) instead.
- Do not prepend "ldap://" to the host name. However, if your LDAP server uses TLS, you can prepend with "ldaps://". (By default TLS is used instead of SSL.)
LDAP port number
LDAP server port number, e.g. 389
LDAP base distinguished name
LDAP base distinguished nam, e.g. dc=foo,dc=bar.
LDAP user distinguished name
LDAP distinguished name for login (if the distinguished name requires additional info other than the user-inputted user name), e.g.
uid={username},dc=mycompany,dc=com. If no additional info is required, leave this setting empty.
Notes
- The generated script will replace {username} by the user name inputted by user in the login page automatically during login.
- If you're running Active Directory, you can use the user's userPrincipalName (e.g. username@mycompany.com) as the user name.
LDAP options
PHP array of options, for use with
ldap_set_option, e.g. LDAP_OPT_XXX => "xxx". By default the following options are already set:
[LDAP_OPT_PROTOCOL_VERSION => 3, LDAP_OPT_REFERRALS => 0]
Google client ID
Enable
Google Sign-In. Requires both
Google client ID and
Google client secret. To create client id and secret, read
Creating a Google API Console project and client ID.
Note When you configure your project at google.com, the Authorized Rdirect URI should be set as https://www.company.com/basepath/login/Google, replace "https://www.company.com/basepath" by the real URL of your project.
Facebook app ID
Enable
Facebook Login. Requires both
Facebook app ID and
Facebook app secret. To implement Facebook Login, you need a Facebook App ID before you start, which you can create and retrieve on the
App Dashboard. Read
Register and Configure an App.
Note When you configure your app at App Dashboard, the Redirect URI should be set as https://www.company.com/basepath/login/Facebook, replace "https://www.company.com/basepath" by the real URL of your project.
Facebook app secret
Enable
Facebook Login. Requires both
Facebook app id and
Facebook app secret. To implement Facebook Login, you need a Facebook App ID before you start, which you can create and retrieve on the
App Dashboard. Read
Register and Configure an App.
Azure app ID
Enable
Microsoft Azure Single Sign-On. Requires both
Azure app ID and
Azure app secret value. To implement Azure Single Sign-On, you need a Azure app ID before you start, see
Register an application.
Note When you configure your app at Azure portal, the Redirect URI should be set as https://www.company.com/basepath/login/Azure, replace "https://www.company.com/basepath" by the real URL of your project.
Azure app secret value
Enable
Microsoft Azure Single Sign-On. Requires both
Azure app id and
Azure app secret value. You need to add a new client secret to your Azure app at Azure portal and then copy the client secret value here.
Notes
- After creating the client secret at Azure portal, make sure you copy the client secret value immediately. Client secret values cannot be viewed, except for immediately after creation. Be sure to save the secret when created before leaving the page.
- Copy the client secret Value, NOT the Secret ID.
Use cookie policy
For compliance with EU's General Data Protection Regulation (GDPR). If enabled, show cookie consent and privacy page.
Use Personal Data Page
For compliance with EU's General Data Protection Regulation (GDPR). If enabled, allow user to download and delete personal data.
Cookie Secure
Specify cookie
Secure in days.
Cookie SameSite
Specify cookie
SameSite in days. Possible values: Strict, Lax, None. The None value requires the
Secure attribute.
Use Swagger UI for API
Whether to allow testing API sctions with
Swagger UI at
http://mysite/basepath/swagger/.
Session-less API actions
API actions that does not require PHP session. Comma separated value of API action names without spaces, e.g. "file,lookup". Default is "file".
By default, each session is stored in the filesystem. The session file is read once when session_start() is called and written to disk when the script ends. To avoid conflicts, session files are locked during script execution. The read/write and locking processes are expensive. This setting allows you to improve API performance by not starting session for some API actions, e.g. "file".
Note Before adding API actions, make sure your actions do not rely on any session variables. For example, if you want to add "lookup", make sure your lookup table filters (if any) do not use any session variables.
Show current filter
Whether to show current filter, for example, for debug. Default is false. For reports only.
During the course of project development,
it is common that you have altered your database schema. To save the effort of doing the customization
from scratch again, PHPMaker provides you with the ability to synchronize your
project data with the database. The synchronization
process can be invoked in the following situations:
When open a project file, PHPMaker
will automatically check the database to see if the schema has been altered.
You will be prompted to keep or update to the new schema.
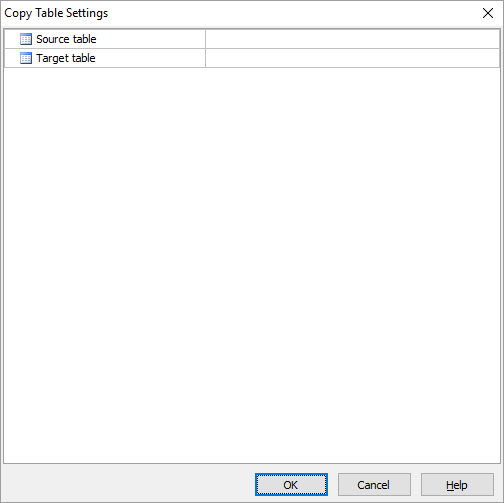
If you use database built-in query/view to make an alternate version of a table, you need to set up the table and field settings again, this tool help you quickly copies table and field settings from the source table to the view. Click Tools -> Copy Table Settings to open the following form:
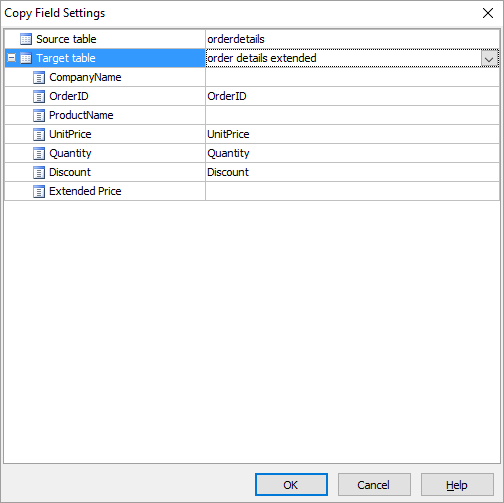
When you create a Custom View, PHPMaker allows you to copy field settings from the source table. However, when database built-in query/view is used, you need to set up the field settings again, this tool help you quickly copies field settings from the source table to the view. Click Tools -> Copy Field Settings to open the following form:
If you prefer to have the table list displayed in the user interface in alphabetical order, click Tools -> Sort Tables Alphabetically to do so.
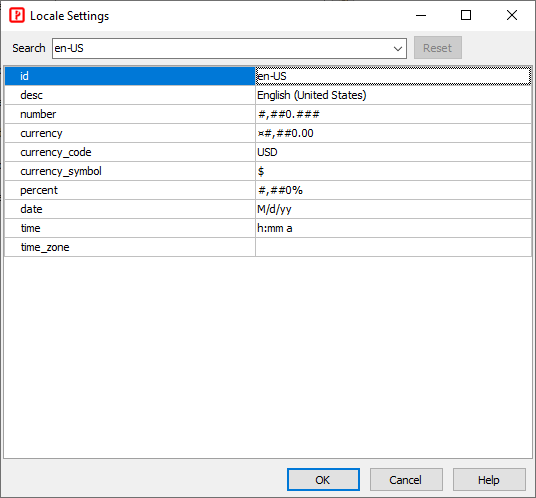
During generation, customized locale settings will be generated as locales files (e.g. en-GB.json) in the "locale" subfolder under the project folder.
When clicked, PHPMaker will try to check if there are updated template (and extensions) on the official website and download them to replace those on your machine. Your PC must be connected to the internet for this feature to work.
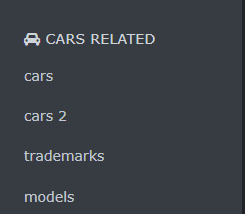
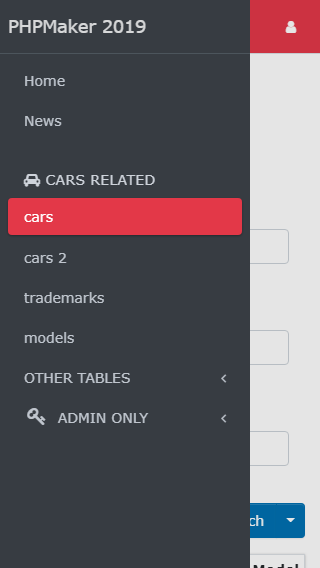
PHPMaker allow you to modify the menu in the generated site, to open the menu editor, click Tools -> Menu Editor in the main menu or click the "Menu Editor" icon in the toolbar.
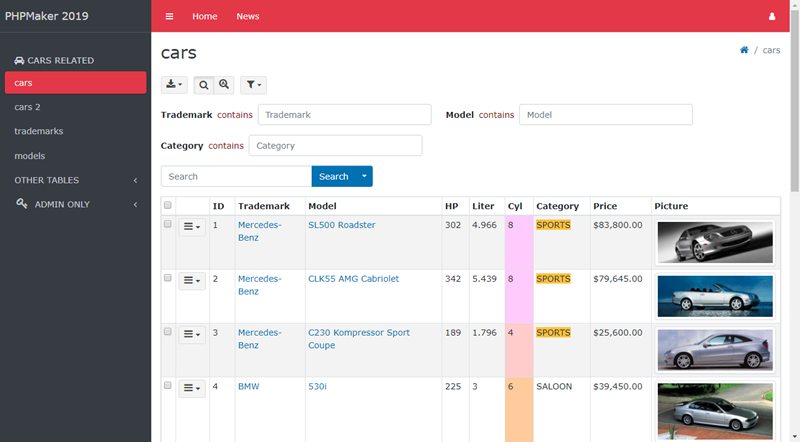
By default, the menu is vertical.
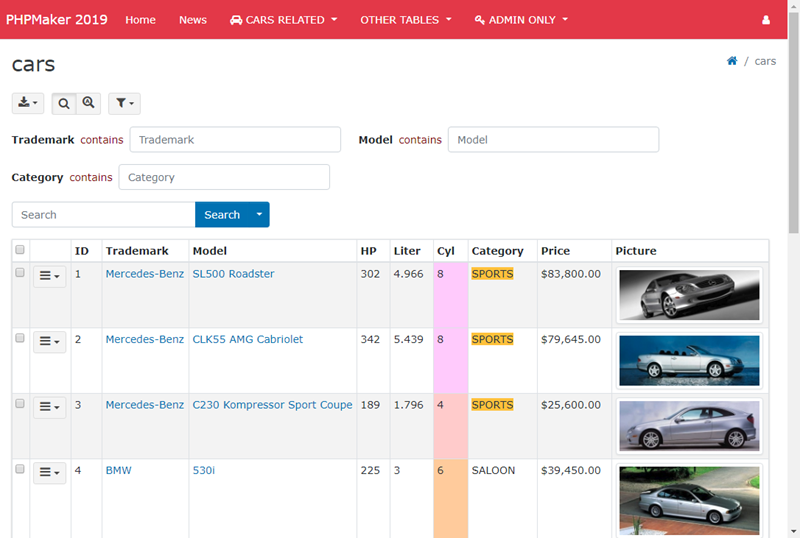
If all menu items are set as navbar items, the left vertical menu will be hidden and top navbar will become like a horizontal menu.
In ALL cases, the mobile menu is vertical.
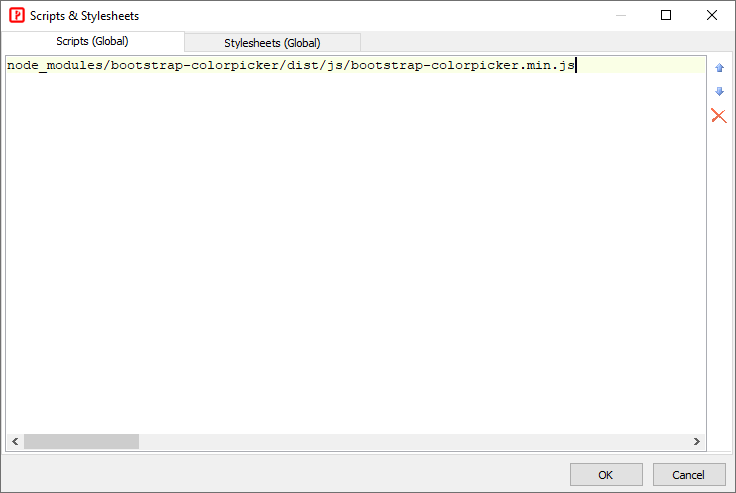
Manage JavaScripts and stylesheets for your project. These scripts will be included in the layout.php. The path(s) can be absolute URL, relative URL or absolute physical path. Absolute/Relative URL is recommended over physical path.
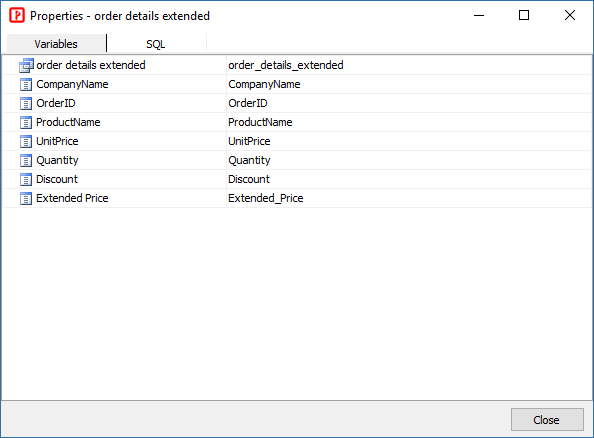
When writing server events and client scripts, you may need to specify database, table or field by their variable names, e.g.