Calendar Report Setup
A calendar report displays data from your database in a month/week/day calendar format using FullCalendar.
To see a demo of the calendar report, please visit Tutorial - Calendar Report.
To create a calendar report, right click the database pane and select Add Calendar Report. Alternatively, you can click Edit in the main menu and then select Add Calendar Report.
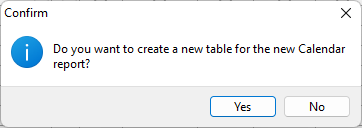
A popup window will appear and ask if you want to create a new table for the Calendar report. If you already have a table that contains the calendar data, click No. Otherwise click Yes.
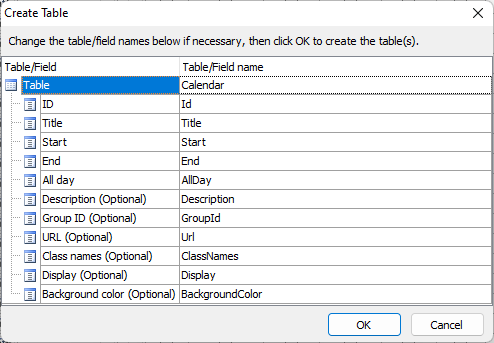
The Create Table window will show up. Change table/field names if necessary. Then click OK to create the table.
After creating the table, the Calendar Report Setup window will show up.
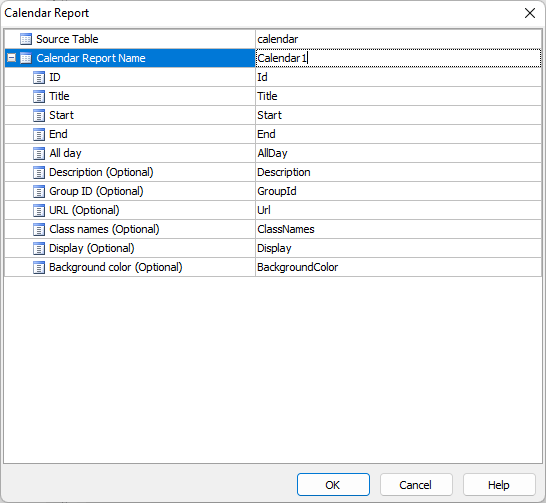
If you have created the table for the Calendar report, most of the settings will be set up. You only need to enter the Calendar Report Name for the Calendar Report. If you use your own table or an existing table, you must select the Source Table for the report and then set up the Calendar fields one by one.
Source Table (string)
Source table of the calendar report
Calendar Report Name (string)
Calendar report name
ID (integer)
Calendar ID field. Unique identifier of the calendar event.
IMPORTANT: The field must be the primary key and auto-increment field
Title (string)
Calendar Title field. The text that will appear on a calendar event.
Start (datetime)
Calendar Start Date field. Specify when a calendar event begins.
End (Optional) (datetime)
Calendar End Date field. Specify when a calendar event ends.
All day (boolean)
Calendar All Day field. Determines if a calendar event is shown in the “all-day” section. If true, the time text is not displayed.
Description (Optional) (string)
Calendar Description field. Detailed description of a calendar event
Group ID (Optional) (string)
Calendar Group ID field. Calendar events with the same group id will be dragged and resized together automatically.
URL (Optional) (string)
Calendar URL field. The URL to redirect to when a calendar event is clicked.
Class names (Optional) (string)
Calendar Class names field. HTML class names attached to the rendered calendar event.
Predefined class names are:
- event-primary
- event-secondary
- event-success
- event-info
- event-warning
- event-danger
- event-light
- event-dark
- event-blue
- event-indigo
- event-purple
- event-pink
- event-red
- event-orange
- event-yellow
- event-green
- event-teal
- event-cyan
- event-white
- event-gray
- event-gray-dark
- event-lightblue
- event-navy
- event-olive
- event-lime
- event-fuchsia
- event-maroon
Notes
- These class names define the event colors and user can type the class name prefix in the Calendar Class names field input box
to get the list of auto-suggested class names (e.g. "p" to get the list of "event-primary", "event-purple" and "event-pink").
- These values are defined in the registry key HKEY_CURRENT_USER\Software\<product name>\<version>\Settings\General\CalendarClassNamesValues.
- When you set up a field as the Calendar Class names field, the predefined values are loaded in the User Values of the Edit Tag.
- You can either change the registry key or the User Values to modify the list of class names.
Display (Optional) (string)
Calendar Display field. The rendering type of the calendar event.
Predefined values are:
- auto
- block
- list-item
- background
- inverse-background
- none
Notes
- These values control which preset rendering style events use. For more information, please read:
https://fullcalendar.io/docs/eventDisplay
- User can select a value in the Calendar Display field dropdown (e.g. "auto").
- These values are defined in the registry key HKEY_CURRENT_USER\Software\<product name>\<version>\Settings\General\CalendarDisplayValues.
- When you set up a field as the Calendar Display field, the predefined values are loaded in the User Values of the Edit Tag.
- You can either change the registry key or the User Values to modify the list of Display value.
Background color (Optional) (string)
Calendar Background color field. The background color displayed for the event.
Press OK to finish setup. When a report is created, the field settings will be copied from the source table. But from then on, the report has its own field settings and is much like other table in PHPMaker.
To edit a report, right click the report in the database pane and select Edit Report. Alternatively, you can select the report first, then click Edit in the main menu and then select Edit Report. Note that the source table of a report cannot be changed.
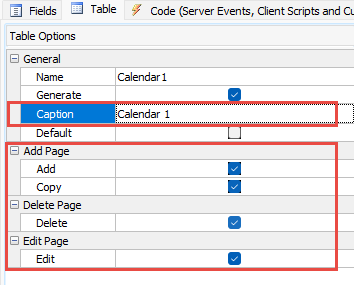
By default, the calendar events can be added, edited and deleted. You can disable add/edit/delete by changing the settings in the Table panel
Important Notes
- After a report is created, a report works independently from the source table it based on. Changing the structure of the source table does not change the report. If you delete a field in the source table that is used by a report, the report will fail. If it fails, the reports will be displayed with a cross in the icon
 . Also, a report has its own field settings, changing field settings in the source table does not change the field settings in related Reports.
- Report supports User ID and User Level. (See Security)
Server Events and Client Scripts
You can use the Page_Head to change the default options for FullCalendar, ew.calendarOptions. See FullCalendar documentation for available options.
You can also use Startup Script and the "calendar" event to change the options of FullCalendar before it is created.
Example
Set the
initialView (A name of any of the available views, such as "dayGridWeek", "timeGridDay", "listWeek", default is "dayGridMonth".)
Also See
Security Setup
Tutorial - Calendar Report