Tutorial - Dashboard Report
In this tutorial we will show you how to create a Dashboard Report in PHPMaker. We will use the demo project for demonstration.
Steps to Create the Dashboard Report
1. Open PHPMaker
Open PHPMaker and then open the demo project.
2. Add Dashboard Report
Right click Reports on the database pane then click Add Dashboard Report, or
click Edit in the main menu and then select Add Dashboard Report.
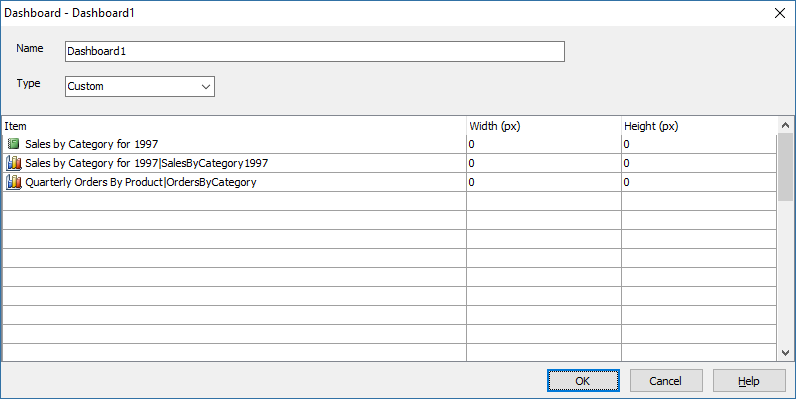
- The report setup form will show up, enter the report name, here we will use the default "Dashboard1".
- Then select the report type (Vertical/Horizontal/Custom). If you want to display the charts in simple vertical and horizontal layout, just choose Vertical or Horizontal.
In this example, we'll use our own custom template, so we choose Custom.
- Choose the items for the Dashboard Report as above.
- Click [OK] button to finish. You should find the new report appears under the Reports node of the Database pane.
- To specify the custom template for the new Dashboard report, Select the Dashboard report in the Database pane,
- Go to the Code (Server Events, Client Scripts and Templates) tab on the right, scroll down to find Custom Template > Table-Specific > Dashboard -> CustomTemplate,
- Enter your custom template in HTML. For example, we can use:
where the {{{item<n>}}} tags denote the items you specified in the report setup form. (Note that in these tags there is no spaces between "item" and the item number.)
3. Generate scripts
Go to the Generate tab, click the Generate button to generate
scripts.
4. Run the application
Browse the generated site, go to "Dashboard 1" report to see the result.
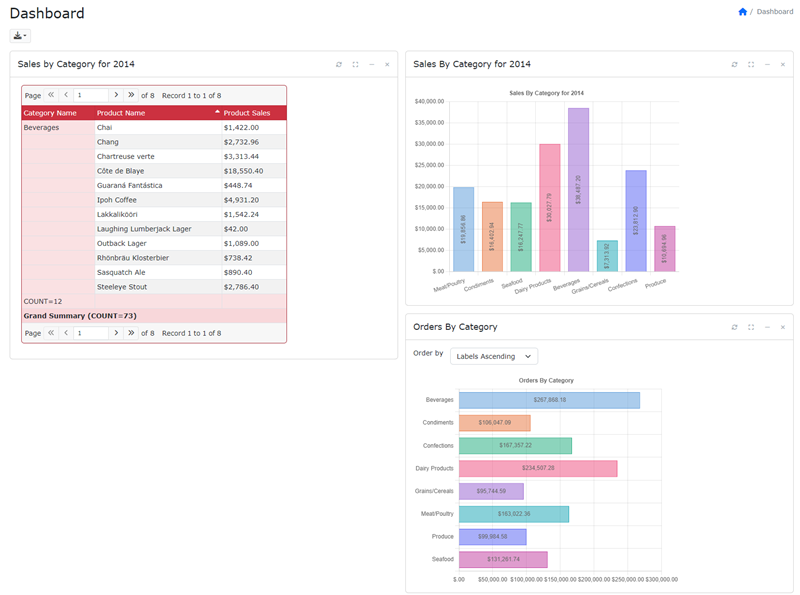
Click the charts to go to the original report where the chart is from.