
Custom View allows you to save a simple SELECT statements in a project as a virtual table.
Converting Custom View to Database View
Custom View expects a simple SELECT statement only. If you create a Custom View with a SELECT statement with some complex clauses, or with an UNION statement instead of a single SELECT statement, the sorting or searching may fail. In such cases you should change the Custom View to database view. PHPMaker allows converting your Custom View to database view provided that the database user have CREATE VIEW privilege.
After loading the database in PHPMaker, the database objects (tables, views, custom views and reports) will be shown in the left pane (the database pane). To convert a Custom View to database view, right click the Custom View in the database pane and select Convert Custom View to View. Alternatively, you can select the Custom View first, then click Edit in the main menu and then select Convert Custom View to View. After creating the view, the existing Custom View and field settings will be moved to the new view. If your project is connected to a development database, export the new views and recreate them on your production database during deployment.
Creating Custom View
To create a custom view, right click the database pane and select Add Custom View. Alternatively, you can click Edit in the main menu and then select Add Custom View.
The Custom View Setup window will show up:
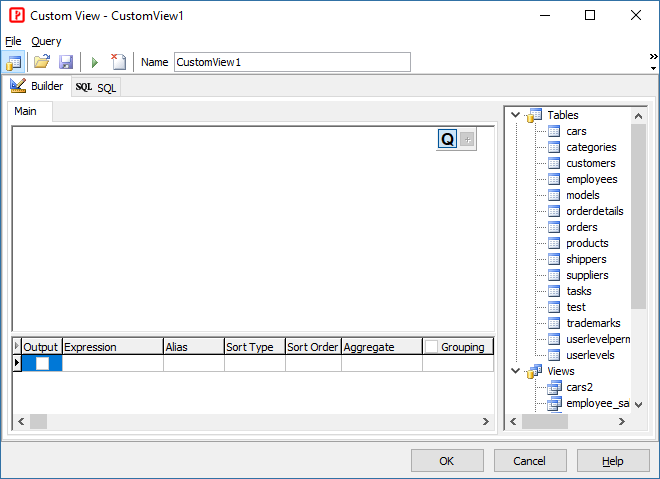
PHPMaker will give the new Custom View a temporary name, CustomView<n>, where n is an integer. If you want to change the name, enter a new name in the Custom View name edit box in the main toolbar.
It is recommended that the built-in visual query builder be used to build your SQL. The query builder interface is intuitive and fully supports drag-n-drop, in most cases you don't need to type the table or field names.
On the left hand side, the available tables are displayed in the table pane. On the right hand side, there are three tabs: Builder, SQL and Result. (The Result tab will only be visible after you execute the SQL.)
Builder
To build your SQL, drag your tables from the table pane on the left to the builder area and check the required fields.
To create a link between two objects (i.e. join them) you should select the field by which you want to link an object with another and drag it to the corresponding field of another object. After you finish dragging, a line will appear between the linked fields. The join type created by default is INNER JOIN, i.e. only matching records of both tables will be included in resulting dataset. To define other types of joins you should right click the link and select the Edit... item from the drop down menu or simply double-click it to open the Link Properties dialog. This dialog allows you to define join type and other link properties.
The easiest way to add a field to the list of query output fields is to check the checkbox at the left of field name in the Query Building Area. To include all the fields of an object you should click the checkbox at the left of the asterisk item of an object.
Another way is to select a field name from the drop-down list of the Expression column in the Columns Pane. And the most common way is to write any valid expression to the Expression column in the Columns Pane.
To remove a field from the list of query output fields you should uncheck the checkbox at the left of field name in the Query Building Area or you may remove it by unchecking the Output column checkbox.
Such operations as removing lines from the Columns Pane or re-ordering output fields are available by right clicking on the left-most gray column via the drop-down menu.
To define sorting of output query fields you should use the Sort Type and Sort Order columns of the Columns Pane.
The Sort Type column allows you to specify how the fields will be sorted - in Ascending or Descending order.
The Sort Order column allows you to setup the order in which fields will be sorted, if there are more than one field to sort specified.
To cancel sorting by some field you should clear the Sort Type column for this field.
To define criteria for the expression listed in the Columns Pane you must use the Criteria column.
Here you should write the criteria omitting the expression itself. For get the following criteria in your query
WHERE (field >= 10) AND (field <= 20)
you should write
>= 10 AND <= 20
in the Criteria column.
You may specify several criteria for one expression using the Or... columns. These criteria will be concatenated in the query with the OR operator.
To setup grouping by some of the fields and/or to define aggregate functions on grouped rows you may use the Group by column.
You may select one of the following values for this column from the drop-down list:
SQL
You can always click the SQL tab to check the SQL generated by the query builder, the SQL editor is also syntax-highlighted to enhance the readability of the SQL.
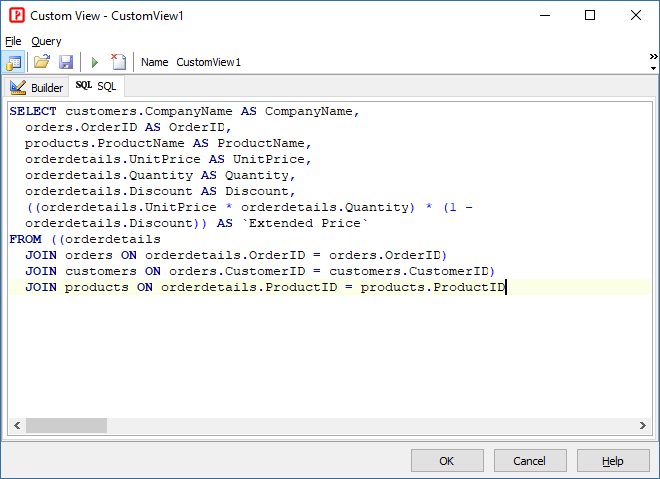
The SQL tab is actually an SQL editor, you can type your SQL directly without using the query builder here, or paste your SQL from elsewhere, or open a saved SQL script (*.sql) from file.
Result
When you have finished your SQL, you can test the SQL by any one of the following ways: (for "DIRECT" connection only)
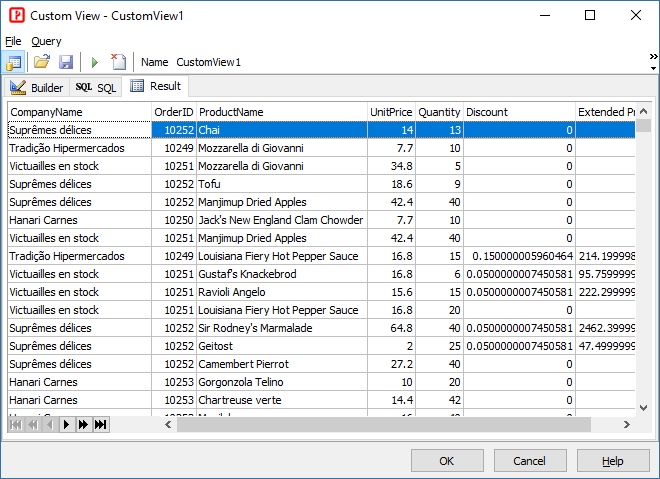
The Result tab will become visible and display the result data. If the data is correct, the Custom View setup is almost done.
Note Executing the SQL is for testing the SQL only. The data displayed in the Result tab will not show the memo fields and blob fields, they may be represented by "(MEMO)" and "(BLOB)" only. This is not related to the data that will be displayed by the generated scripts.
When a Custom View is added, PHPMaker will load it and display it in the database pane and Table Setup page under the Custom Views node. To view the SELECT statement of the Custom View, right click the Custom View in database pane and select Object Properties. Alternatively, you can select the Custom View first, then click Project in the main menu and then select Object Properties.
To edit a custom view, right click the Custom View in the database pane and select Edit Custom View. Alternatively, you can select the Custom View first, then click Edit in the main menu and then select Edit Custom View.
When a Custom View is added or edited, PHPMaker will check the SQL. If the SQL is invalid, the icon of the Custom View will have a cross on it like ![]() , you can view the error in the Object Properties window and then edit the Custom View to correct the SQL.
, you can view the error in the Object Properties window and then edit the Custom View to correct the SQL.