
In this tutorial we will show you how to setup file upload to folder in PHPMaker. We will use the demo database for demonstration.
Fields in Table "employees":
We want to setup the "Photo" field in the "employees" table for image upload to folder. Note that unlike in the tutorial File Upload to Database in which we used a binary field ("Picture") to store data in database, this time we choose "Photo" which is a text field only. It is because this field will be used for storing the filename, the uploaded file will be stored in the upload folder as a physical file.
Steps to Setup File Upload
1. Open PHPMaker
Open PHPMaker and connect to the demo database.
2. Set up file upload properties
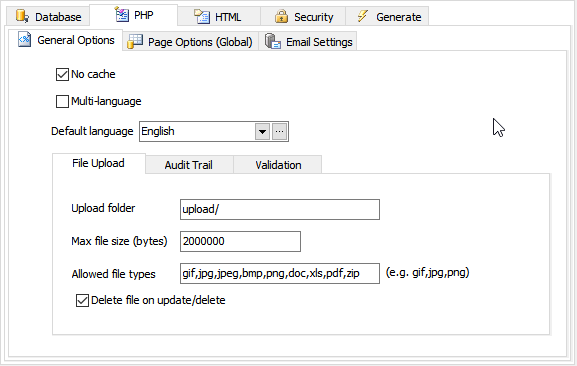
Go to the PHP -> General Options tab.
If you want to change the file size limit on uploading, enter a limit in bytes for the Max file size (bytes) field. The installation default is 2,000,000 bytes.
In Allowed file type, enter the file extensions that you allow user to upload.
Then, you need to enter the Upload folder. (Do NOT leave it empty.) This folder should be a subfolder relative to the project folder. For example, you can enter "uploads/" (use slashes "/" as path delimiter). If the project folder is D:\websites\projectname\, then the upload folder is D:\websites\projectname\uploads\.
If you want to use remote folders (e.g. AWS S3, Google Cloud Storage, Azure Blob Storage), you need to specify [Filesystem URI](filestorage.html?id=filesystem-uri), e.g. you can enter "s3://my-bucket/" (WITHOUT quotes and WITH trailing slash). (In this special case, the path is not relative to project folder.) To use AWS S3, Google Cloud Storage, Azure Blob Storage, read [File Storage](filestorage.html) for details..
Make sure that the web server user has read/write access to the folder.
If want to delete the uploaded file when the field value is replaced, removed or if the record is deleted, check Delete file on update/delete.
If Delete file on update/delete is enabled, the uploaded file will be deleted. If the deleted record is a copied record, deleting the uploaded files will affect the original record. To prevent such possible problem, enable Advanced Setting Create upload file on copy (see Advanced Settings) to duplicate the uploaded file when copying a record.
3. Set up Edit Tag settings
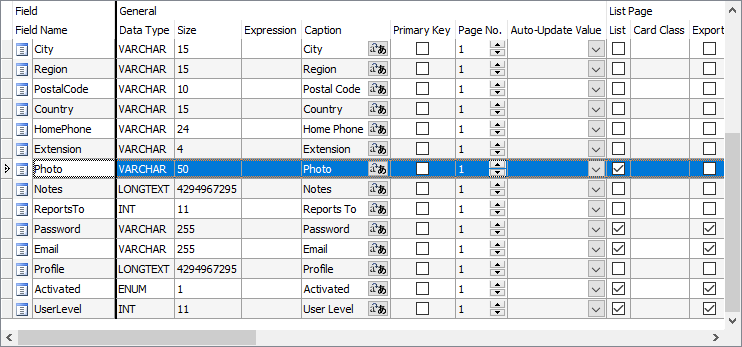
Select the "employees" Table on Database pane and then click on the "Photo" field.
In the Edit Tag Panel, click the File Upload icon ![]() to select the Edit Tag as "FILE".
to select the Edit Tag as "FILE".
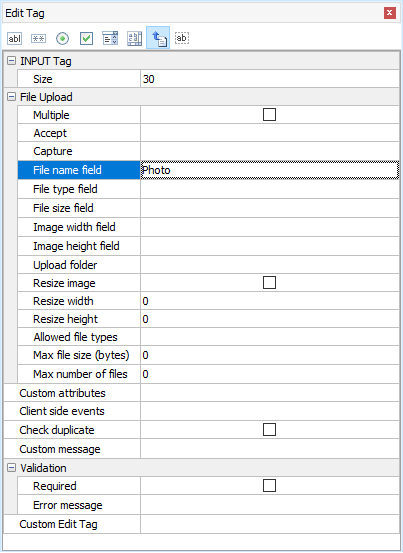
If you want to allow multiple file upload, enable Multiple. If enabled, the field value will store comma separated file names of the uploaded files.
If you are uploading image, you can choose to resize the image. Check Resize image and enter the Resize width and Resize height.
If you have field specific settings for Upload folder, Allowed file types, Max file size (bytes) and Max number of files, enter them as needed. See Field Settings for detail.
4. Set up View Tag settings
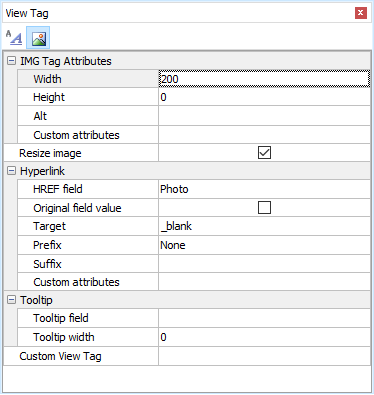
You can choose to display the file field using the Formatted
Text ![]() View Tag or Image
View Tag or Image ![]() View Tag. Default is Formatted Text.
View Tag. Default is Formatted Text.
Formatted Text View Tag will display the field as a hyperlink to the file.
Image View tag will display the field as image using <img> tag and is also hyperlinked to the image. To change image display style to Image, click on the Image ![]() icon in the View Tag Panel for the settings.
icon in the View Tag Panel for the settings.
If the dimensions of the image you want to display are different from the stored image, you can choose to resize it. If enabled, the image will be resized to the specified width and/or height on display. Again, resizing requires PHP GD extension, see the note above.
If you want to add hyperlink to the image, set the HREF field. If you want the image linked to the file, select the field itself as the HREF field. If you want to image linked to other URL, select another field which stores the URL. You can also optionally set the target of the hyperlink.
5. Generate scripts
Go to the Generate tab, click the Generate button to generate scripts.
6. Run the application
Click on the link to the employees table. You should now be able to add, view, edit and delete records with file/image fields.
Formatted Text View Tag will display the field as a hyperlink to the file/image.
![]()
Image View tag will display the field as image using <img> tag and is also hyperlinked to the image:

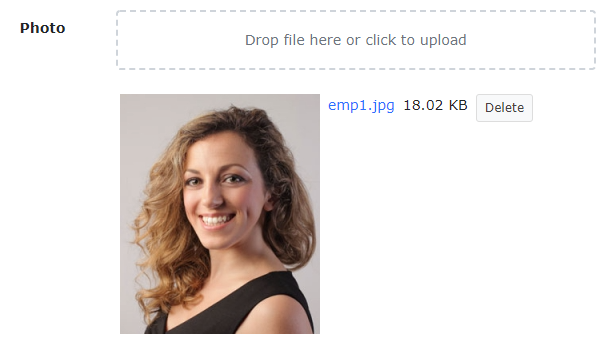
The Edit page will allow you to delete or replace an existing file/image:
Also See