
Custom Files enables you to add your own files to the project. A Custom File is a simply blank page with the layout of the project (optional) for you to add your own content so it will have a consistent look and feel like other generated files.
How to Use
To create a Custom File, simply right click the database pane or click Edit in the main menu, then select Add File, the following form will show:
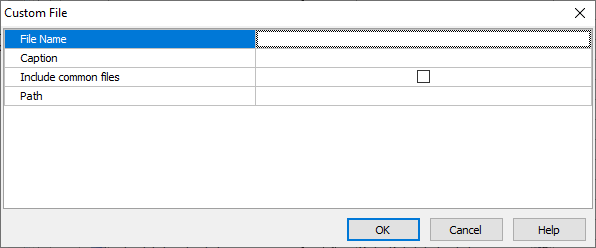
| File Name | File name with extension.
Notes
|
| Caption | **For case 1 (see below).** The caption of the page. This is similar to table caption for a table and will be shown up in the menu and in the Breadcrumbs of the page. |
| Includes common files | **For case 1 (see below).** Specify whether to include common files so the custom file will be consistent with other generated scripts and able to use PHPMaker classes and functions. |
| Path | The path of the page. There are 2 cases:
##### Case 1 - Additional Page (with Layout and HTML Content) Accessible Via Route
| Property | Value | |----------------|--------------------| | **File name** | **_*.php_ or _*.html.twig_ (file name of view)** | | **Includes common files** | ✔ **ENABLED** | | **Path** | **Route path (Optional)** | For example,  In this case, the **Path** is the **route** for the page (NOT output folder), e.g. "/myroute" (no quotes). If route is **unspecified**, the file name without extension will be used as the route, e.g. if your file name you entered is _Home.php_, then the route is `/Home`; if **Lowercase routes** is enabled, then the route is `/home`. Your route can include parameters, e.g. `'/myroute/{param1}/{param2}'`, see [Route Parameters](https://symfony.com/doc/current/routing.html#route-parameters) for details. You can get the parameters in your code by `Route("param1")` and `Route("param2")`. If route is **unspecified**, a catch-all parameter `/{params?}` will be added, you can get the parameter by `Route("params")`. If you pass multiple parameters in the URL, e.g. `/myroute/value1/value2/value3`, the `Route("params")` returns `value1/value2/value3` and you need to split it into separate variables yourself. If you want full control over the route attributes and the controller parameters, you can use **Controller_Action** server event (see below). The page class of the file is generated in the _"models"_ folder and the content of the file (i.e. the view) is generated in the _"views"_ folder. The file names are in Pascal case. The output folders and file names cannot be changed. Note that the file names are NOT related to the route path or the URL.
**Notes**
1. A **route** is NOT the physical output folder or file path for your file, DO NOT try to specify a route like a folder or file path (e.g. "myfolder/" or "myfolder/myfile.php"). A route must begin with a leading slash, but no trailing slash, e.g. "/myroute".
1. **Always access your custom page by its route (e.g. "/myroute"), NEVER try to access it by its physical path (e.g. "/views/myfile.php").**
1. If you only want to output a single value or JSON, you should not use this case, you'd better use **Controller_Action** server event or route/API controller.
1. If **Controller_Action** is used, the controller method includes the **route attribute**, the path specified by the **route attribute** will override the **Path** setting.
##### Case 2 - Class or Standalone File
| Property | Value | |----------------|--------------------| | **File name** | **_*.php_ or other non-PHP files** | | **Includes common files** | **✘ DISABLED** | | **Path** | **Output folder relative to project folder (Required)** | The file is a **single** file, NO other related files (e.g. page class, controller and view) and no route will be generated, e.g. 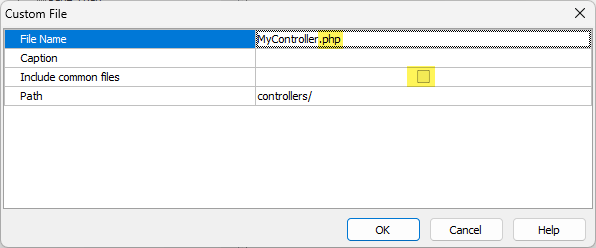 In this case, the **Path** is the **output folder relative to the project folder**. For example, if your project folder is *D:\websites\myproject* and you want to generate the page in *D:\websites\myproject\myfolder*, then you should enter `"myfolder"` (no quotes, no leading slash, no parent path).
**Notes**
1. **This is a very powerful feature, you can use this to add your own classes to your project, see examples below.**
1. Do NOT use leading slash for the output folder path.
1. Do NOT use parent path `".."` or the file will be generated outside the project folder.
|
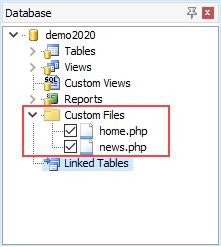
After entering above properties, click OK button to save. The Custom File will show up in the database pane under the Custom Files node:
To edit the Custom File properties, right click the Custom File in the database pane and select Edit File.
To delete a Custom File, right click the Custom File in the database pane and select Delete File.
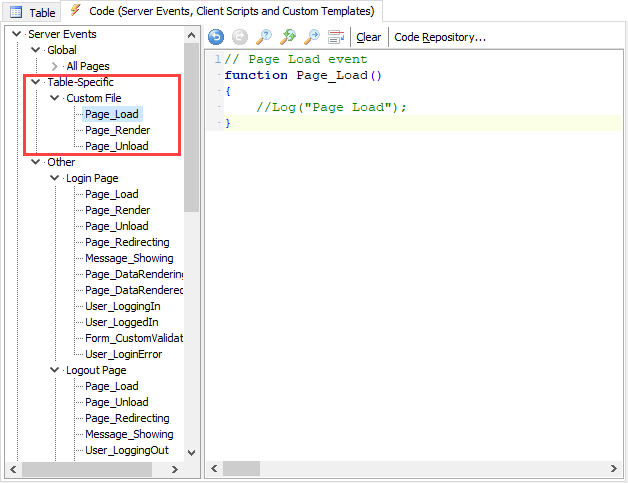
To enter server events or content for the file, select the Custom File in the database pane , then select the Code tab (which contains Server Events, Client Scripts and Custom Templates) in the right pane.
To enter server event, go to Server Events -> Table-Specific -> Custom File:
To enter content for the file, Scroll down the treeview or collapse the Server Events and Client Scripts node, select the Custom Templates -> Table-Specific -> Custom File -> Content node, then you can enter or paste your content in the editor:

Then just save your project, generate and run your scripts as usual.
Controller_Action Server Event
Route Attributes
PHPMaker uses PHP attributes to define routes next to the code of the controllers associated to those routes. **Make sure you define route attribute for each controller action.** The path specified by the route attribute overrides the **Path** setting (see above) of the custom file. The parameters of the attribute ``Route`` are: (including but limited to) - ``path`` _(string)_ - The path pattern to match, see [Creating Routes as Attributes](https://symfony.com/doc/current/routing.html#creating-routes-as-attributes). - ``methods`` _(string|array)_ - By default, routes match any HTTP verb (`GET`, `POST`, etc.) Use this option to restrict the verbs each route should respond to. It is a required HTTP method or an array of restricted methods: "GET", "POST", "PUT", "DELETE", "OPTIONS", "PATCH". - ``defaults`` _(array)_ - An array of default parameter values, see [Optional Parameters](https://symfony.com/doc/current/routing.html#optional-parameters). - ``requirements`` _(array)_ - An array of requirements for parameters (regexes), see [Parameters Validation](https://symfony.com/doc/current/routing.html#parameters-validation). - ``name`` _(?string)_ - Route name, it is essential for [generating URLs](https://symfony.com/doc/current/routing.html#generating-urls). Keep in mind that each route name must be unique in the application. **Note** You can omit the first parameter name (i.e. ``path:``) if you specify the route pattern as the first argument. Other arguments should be used with parameter names so you don't need to care about the parameter position. See [Routing](https://symfony.com/doc/current/routing.html) for detailed information about route attributes.Examples
###### Example 1 - Use HTML in ViewAdd a Bootstrap Card in the page to show some news.
The result: 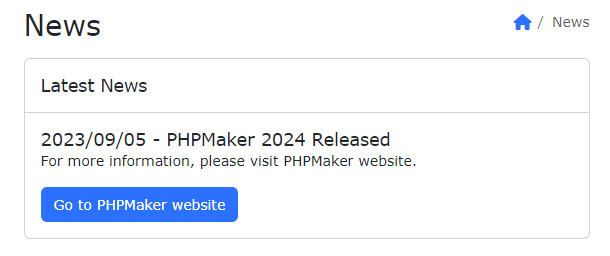Learn More
You can use Custom Files to add various classes to your application, read: - [Controllers](https://symfony.com/doc/current/controller.html) - [Creating an Event Listener](https://symfony.com/doc/current/event_dispatcher.html#creating-an-event-listener) - [Defining Event Listeners with PHP Attributes](https://symfony.com/doc/current/event_dispatcher.html#defining-event-listeners-with-php-attributes) - [Creating an Event Subscriber](https://symfony.com/doc/current/event_dispatcher.html#creating-an-event-subscriber) - [Doctrine Entity Listeners](https://symfony.com/doc/current/doctrine/events.html#doctrine-entity-listeners) (listen to a single Doctrine event on a single entity class) - [Doctrine Lifecycle Listeners](https://symfony.com/doc/current/doctrine/events.html#doctrine-lifecycle-listeners) (listen to a single Doctrine event on all the application entities) - [Using a Factory to Create Services](https://symfony.com/doc/current/service_container/factories.html) - [How to Import Configuration Files/Resources](https://symfony.com/doc/current/service_container/import.html) - [Data customization and validation](https://symfony.com/bundles/LexikJWTAuthenticationBundle/current/2-data-customization.html) (for JWT)