This extension (for registered users only) adds chatting feature to your site, powered by [Chatify](https://chatify.munafio.com/) which is an **one-to-one** users chatting system using [Pusher](https://pusher.com/).
Pusher supports free **Sandbox** plan which allow 100 concurrent connections and 200,000 messages per day. If you need more, you can upgrade to paid plans.
Pusher Channels provides realtime communication between servers, apps and devices. To publish an event to your web app using Pusher Channels, you need to get your free API keys first.
Set up Pusher
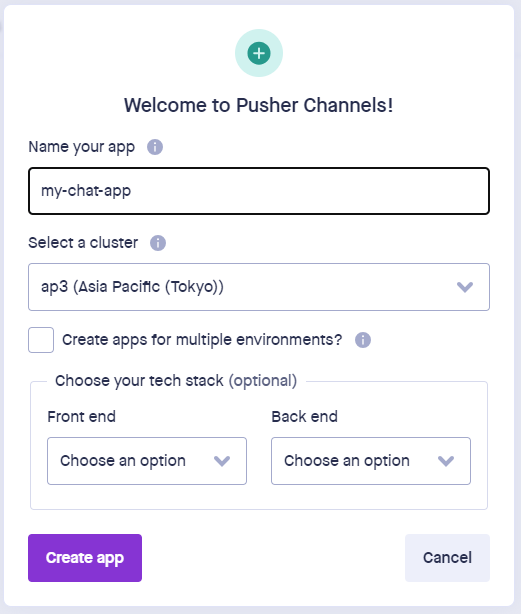
[Create an account](https://dashboard.pusher.com/accounts/sign_up) and then create a Channels app, e.g.
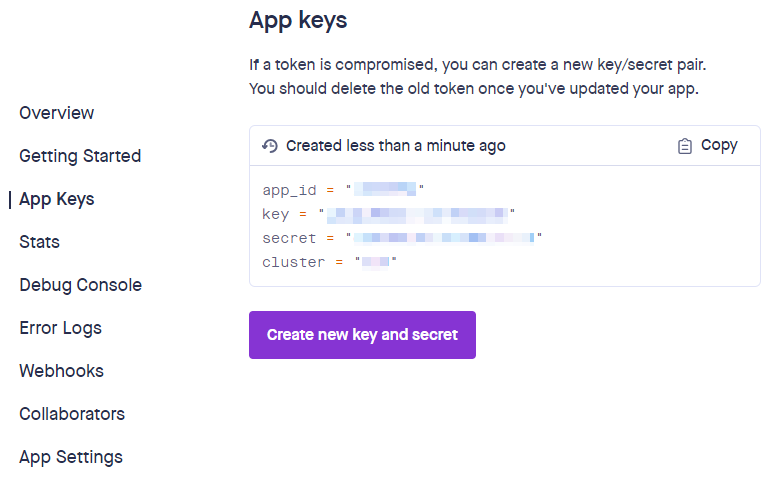
To get API keys, from the Pusher Dashboard, navigate to **App Keys**. Copy your **app_id**, **key**, **secret**, and **cluster**.
Set up Extension
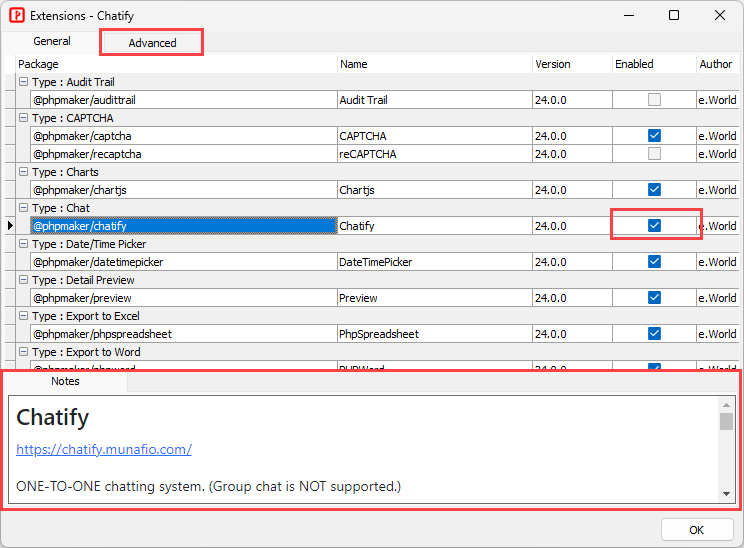
Go to PHPMaker and click **Tools -> Extensions**, select the **Chatify** extension, **make sure you read the notes carefully first as they contain information that you should know**. Then enable the extension.
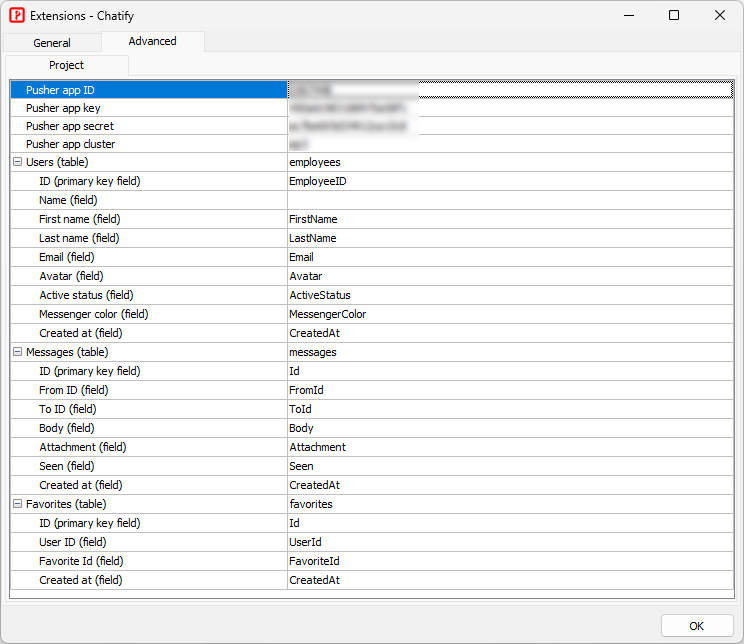
Click the **Advanced** tab, and enter your **app_id**, **key**, **secret**, and **cluster**. Then select the users table in your project. In this example, we use the demo project so the users table is "employees".
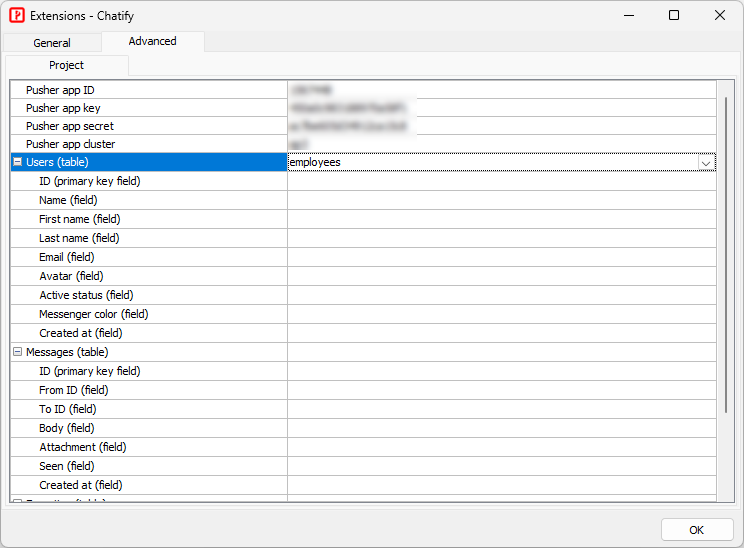
To make the Chatify works you need to alter your users table to add a few fields and add 2 tables to the main database (to which your users table belong). **If you cannot alter the database schema of your main database, you will not be able to use this extension.**
- **Users** (table) - Existing [Users table](https://phpmaker.dev/docs/#/securitysetup.html) of the project (or another table) - ID (primary key field) - The **primary key** field of the table - Name (field) - User display name field. If there is no "Name" field in the table, both "First name" and "Last name" field must be provided. - First name (field) - Only required if no "Name" field in the table - Last name (field) - Only required if no "Name" field in the table - Email (field) - **Avatar** (field) - New field to be added - **Active status** (field) - New field to be added - **Messenger color** (field) - New field to be added - **Created at** (field) - New field to be added - **Messages** (table) - New table to be added - ID (primary key field) - From ID (field) - To ID (field) - Body (field) - Attachment (field) - Seen (field) - Created at (field) - **Favorites** (table) - New table to be added - ID (primary key field) - User ID (field) - Favorite Id (field) - Created at (field)
If the table/field already exists, you can simply select it. If the table/field does not exist, you need to create it. All fields listed above are required, except for the "Name", "First name" and "Last name" fields of the users table. You only need either the "Name" field, or the combination of "First name" and "Last name" fields.
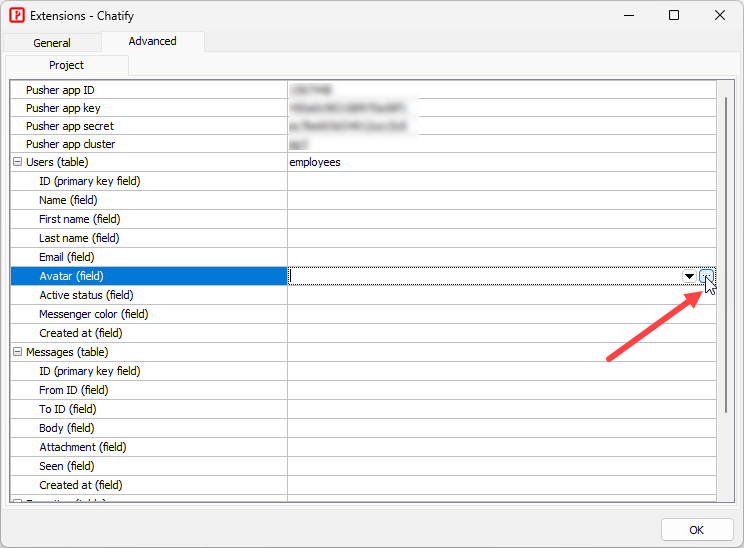
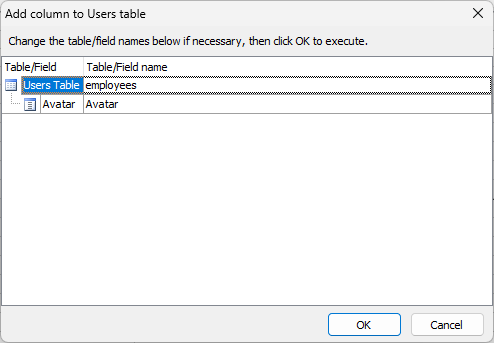
To add a column to your users table, simply the "..." button next to the field name, change the field name if necessary, and press the "OK" button, e.g.
To create the **Messages** and **Favorites**, simply the "..." button next to the table name, change the table/field names if necessary, and press the "OK" button, e.g.
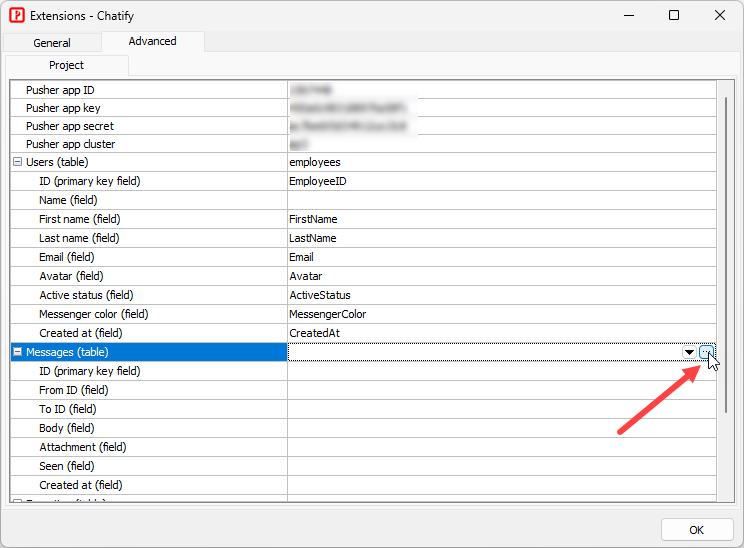

In the example, the settings are:
Press "OK" to save the settings.
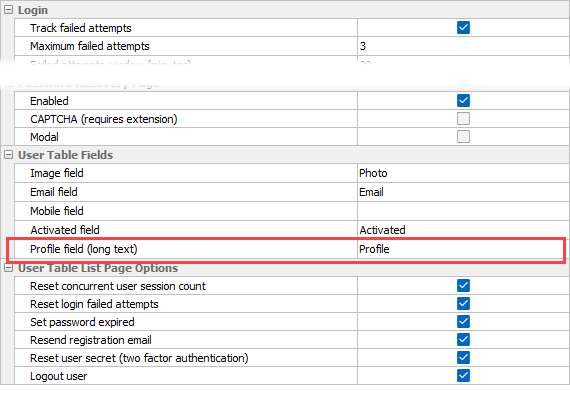
Set up Profile Field
The last step is to set up the **Profile field** under **Security -> User Login Options -> [User Table Fields](securitysetup.html?id=user-table-fields)**. Make sure you have set up **Profile field** or the chat feature cannot be enabled/disabled.
Now you can generate the website again.
Set up Folder Permissions
Start Chatting
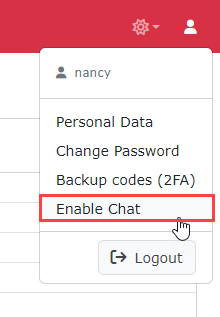
To test the feature, go to the website, login as any user (except the hard-coded super admin). In this example, we login as "nancy".
To toggle chat feature, click the user menu at top right and select **Enable chat** or **Disable chat**:
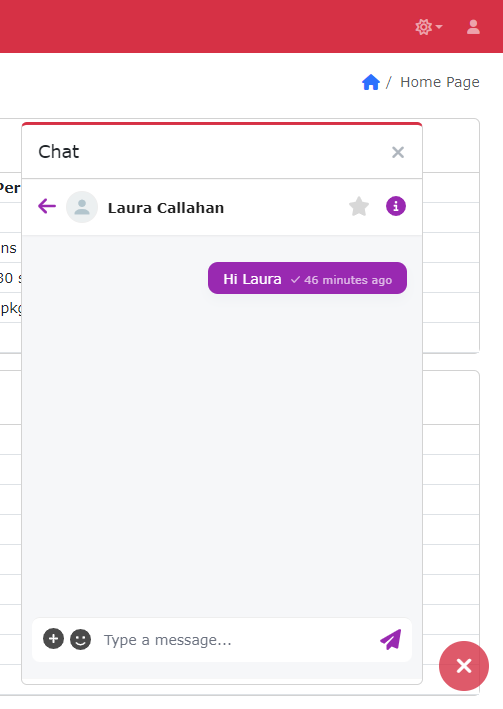
After enabling chat, a chat button will appear at bottom right, click the button to open the chat widget. You can search users to chat with:
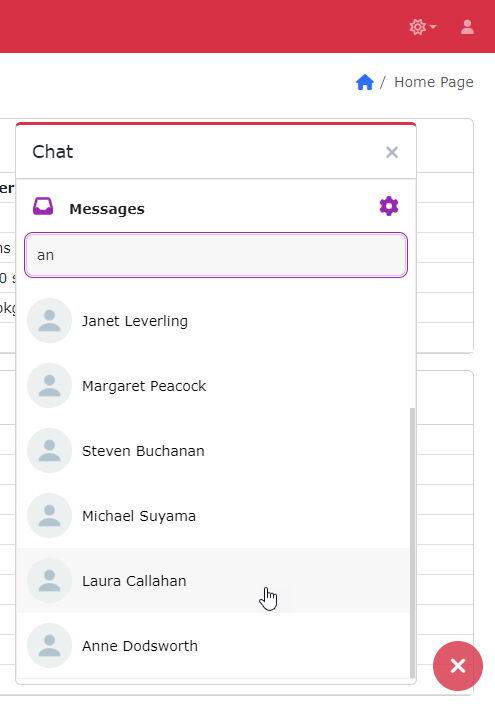
And begin chatting!